Where Are Uploaded Files Stored in Moodle
Uploading files to Moodle
The Moodle online learning environment allows you lot to add a range of different file types to your subject site chop-chop and easily. You tin add written text documents, slideshow presentations, PDF documents, images, video, and zip files every bit either stand-solitary resources or grouped in a downloadable binder.
Note: The library tin support you in maintaining copyright compliance of book chapters, journal manufactures and other Library material. For more data, visit the Subject Readings article.
Why?
Supporting resources that form part of a subject'south learning and didactics content often already exist in the course of digital files. Instead of copy-pasting information from such files into pages or labels in your discipline site, uploading the files allows you lot to easily share content with both students and teaching staff in an easily attainable location (compared to, for example, sharing a file via email). Once you upload the file, it can be overwritten with a new version in the future if required, simply past updating the file resource in the bailiwick site.
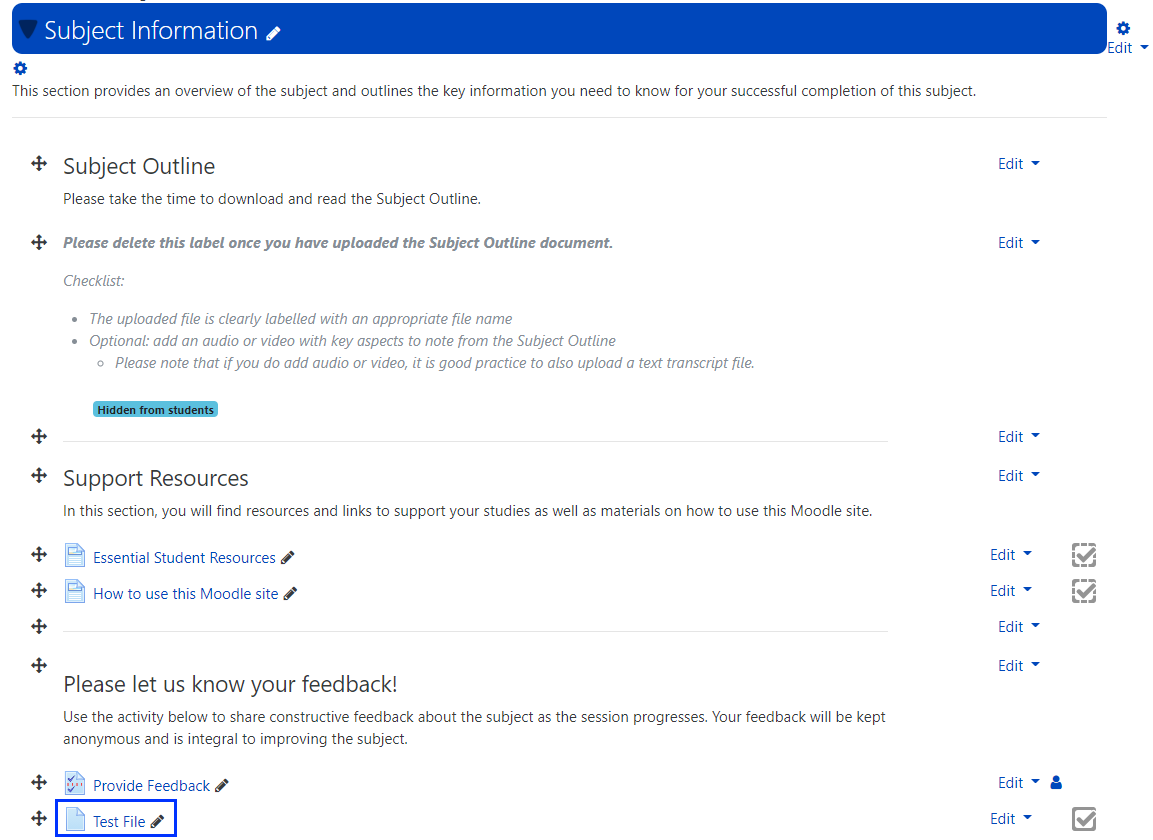
It is important to conspicuously characterization the files y'all upload to help students observe the information they are looking for. In addition, files should exist organised in a way that presents them contextually i.east., in in the aforementioned section, book, or binder every bit other related content.
How?
At that place are two ways to add files to Moodle that are covered in this article:
- Elevate and drop files onto the site page
- Add a File resource.
Drag and drop files
Add together files to your site using elevate-and-drop:
- Click the Turn Edit On button.

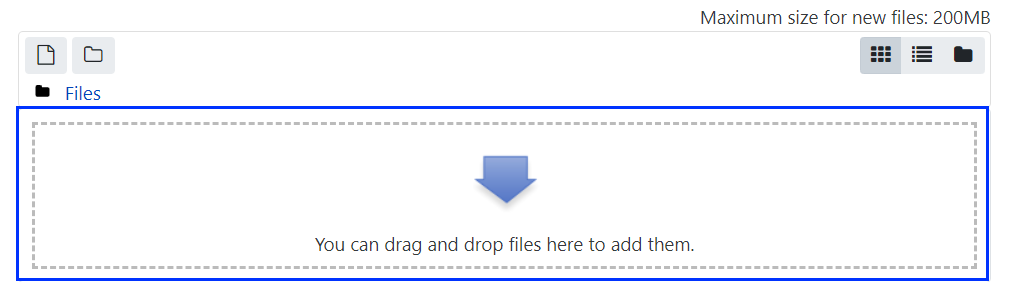
- Using Google Chrome or the Firefox browser (the browser software supported by Moodle), simply drag and drop a file directly onto the page in the section you want to add it to. As you drag the file onto the Moodle site page, you volition see a dotted rectangle announced in the section with the text Add file(s) hither.
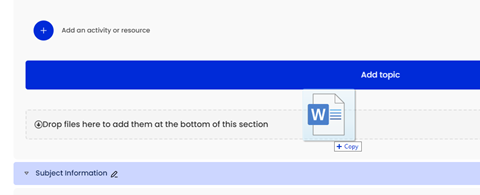
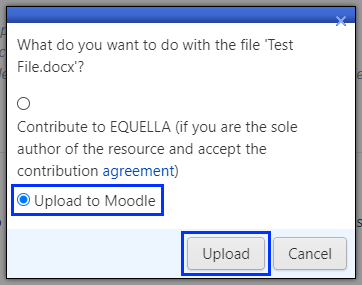
- Release your mouse button and a popup will appear. Click the Upload to Moodle radio button then click the Upload button.
- The file will so appear on your site.
Add a File resource
Y'all can also add together files to your site by adding a File resource:
- Click the Plow Edit On button.
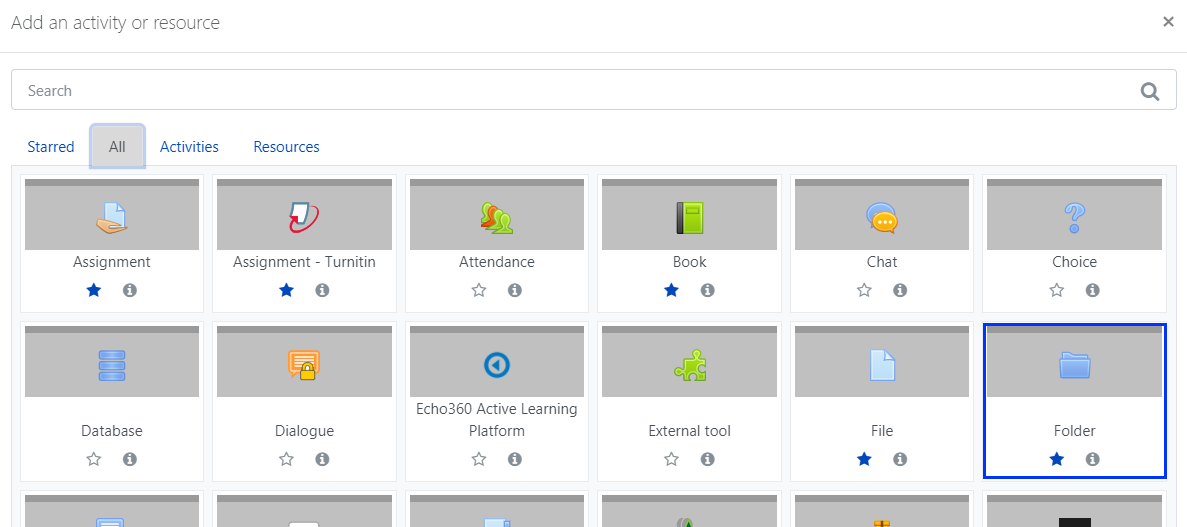
- Click the Add an activity or resource link.
- In the Add an activity or resource chooser, search for or select the File resource.
- Proper name your file by entering it into the Proper noun text box.

- [Optional] Blazon a description of the file into the Description text box.

- [Optional] Click the Display description on site page checkbox to take your clarification appear beneath the file.

- Drag and drop your file into the drop zone to add it to your site.
Note: Although you are allowed to drag and driblet multiple files into this drop zone, the arrangement volition only brandish a single file in this resource.
- Expand the Appearance section.
- Click the Show size, Show type, and Show upload/modified date checkboxes.
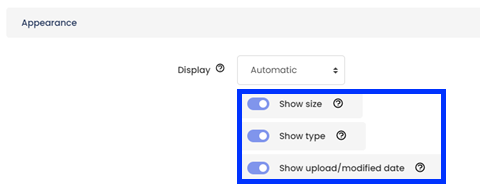
Note: This will add together information about the file size, blazon, and date uploaded as shown in the case screenshot below.

- If you are using the action completion functionality in your site:
- Expand the Activeness completion section.
- Select the appropriate options; an example is shown in the screenshot below.

-
- Click the Salve and return to site button.
Adding multiple files in a Folder resource
If you have multiple related files to upload to your site, you may wish to place them together in a folder. To create a folder in your site:
- Click the Turn Edit On button.
- Click the Add an action or resource link.
- In the Add together an activity or resource chooser, search for or select the Binder resource.
- Proper noun your folder by entering it into the Name text box.
- [Optional] Blazon a description of the binder into the Description text box.
- [Optional] Click the Display description on site page checkbox to take your clarification announced below the folder.
- In the Content section, drag and drop your files into the drop zone to add them to your site.
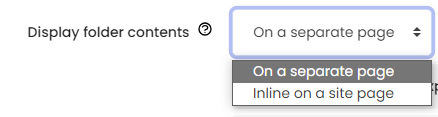
- Choose whether you would like the folder to open in a new tab when users click on it or display the content on the same page by selecting an option from the Brandish binder contents drop-downwardly card.
- Check the Prove subfolders expanded checkbox if you lot would like the contents of subfolders expanded by default when the folder is opened.
- Allow users to download the entire contents of the folder in one get by checking the Bear witness download folder button.
- Click the Save and render to site push.
Source: https://ltc.uow.edu.au/hub/article/uploading-files
Belum ada Komentar untuk "Where Are Uploaded Files Stored in Moodle"
Posting Komentar